RSS

Just SOLD! 3061 Albina St.

Congratulations to my wonderful buyers on the purchase of their first home, a 1940’s character house in the Gorge area of Saanich. Legendary listing agent Jerry Bola was wonderful to work with, friendly and knowledgable! So proud of my buyers for working so hard and sacrificing so much to make home ownership in Victoria a reality. 

I’ll be there on closing day in my overalls, with painting supplies and champagne! We’re also starting our next huge flip, a house in Colwood that needs another gut renovation - our favourite! 

Call StackHaus Realty for all your Real Estate needs - Buying, Selling, Property Management. 

Read

Just SOLD! 11 - 477 Lampson St.

Check out the video we did highlighting all of our renovation and marketing skills. Thank you to our awesome seller and congratulations to the new owners - welcome to Esquimalt! 

Read

Freshly Updated by StackHaus Realty!

When the owner of this townhouse called me and said they needed a local company to transform their rental into a freshly updated home they called the right folks! StackHaus Realty of course! 

Nicky and I got to work removing the old carpets and garbage left by the previous occupant, and gave this home a beautiful turnover in just a matter of weeks. No renovations needed! This property was updated as a tenant turnover, which involves fixing things that have broken over time like shower curtain rods, toilet lids, replacing fixtures like door knobs and updating appliances. Then cleaning and painting every surface! 

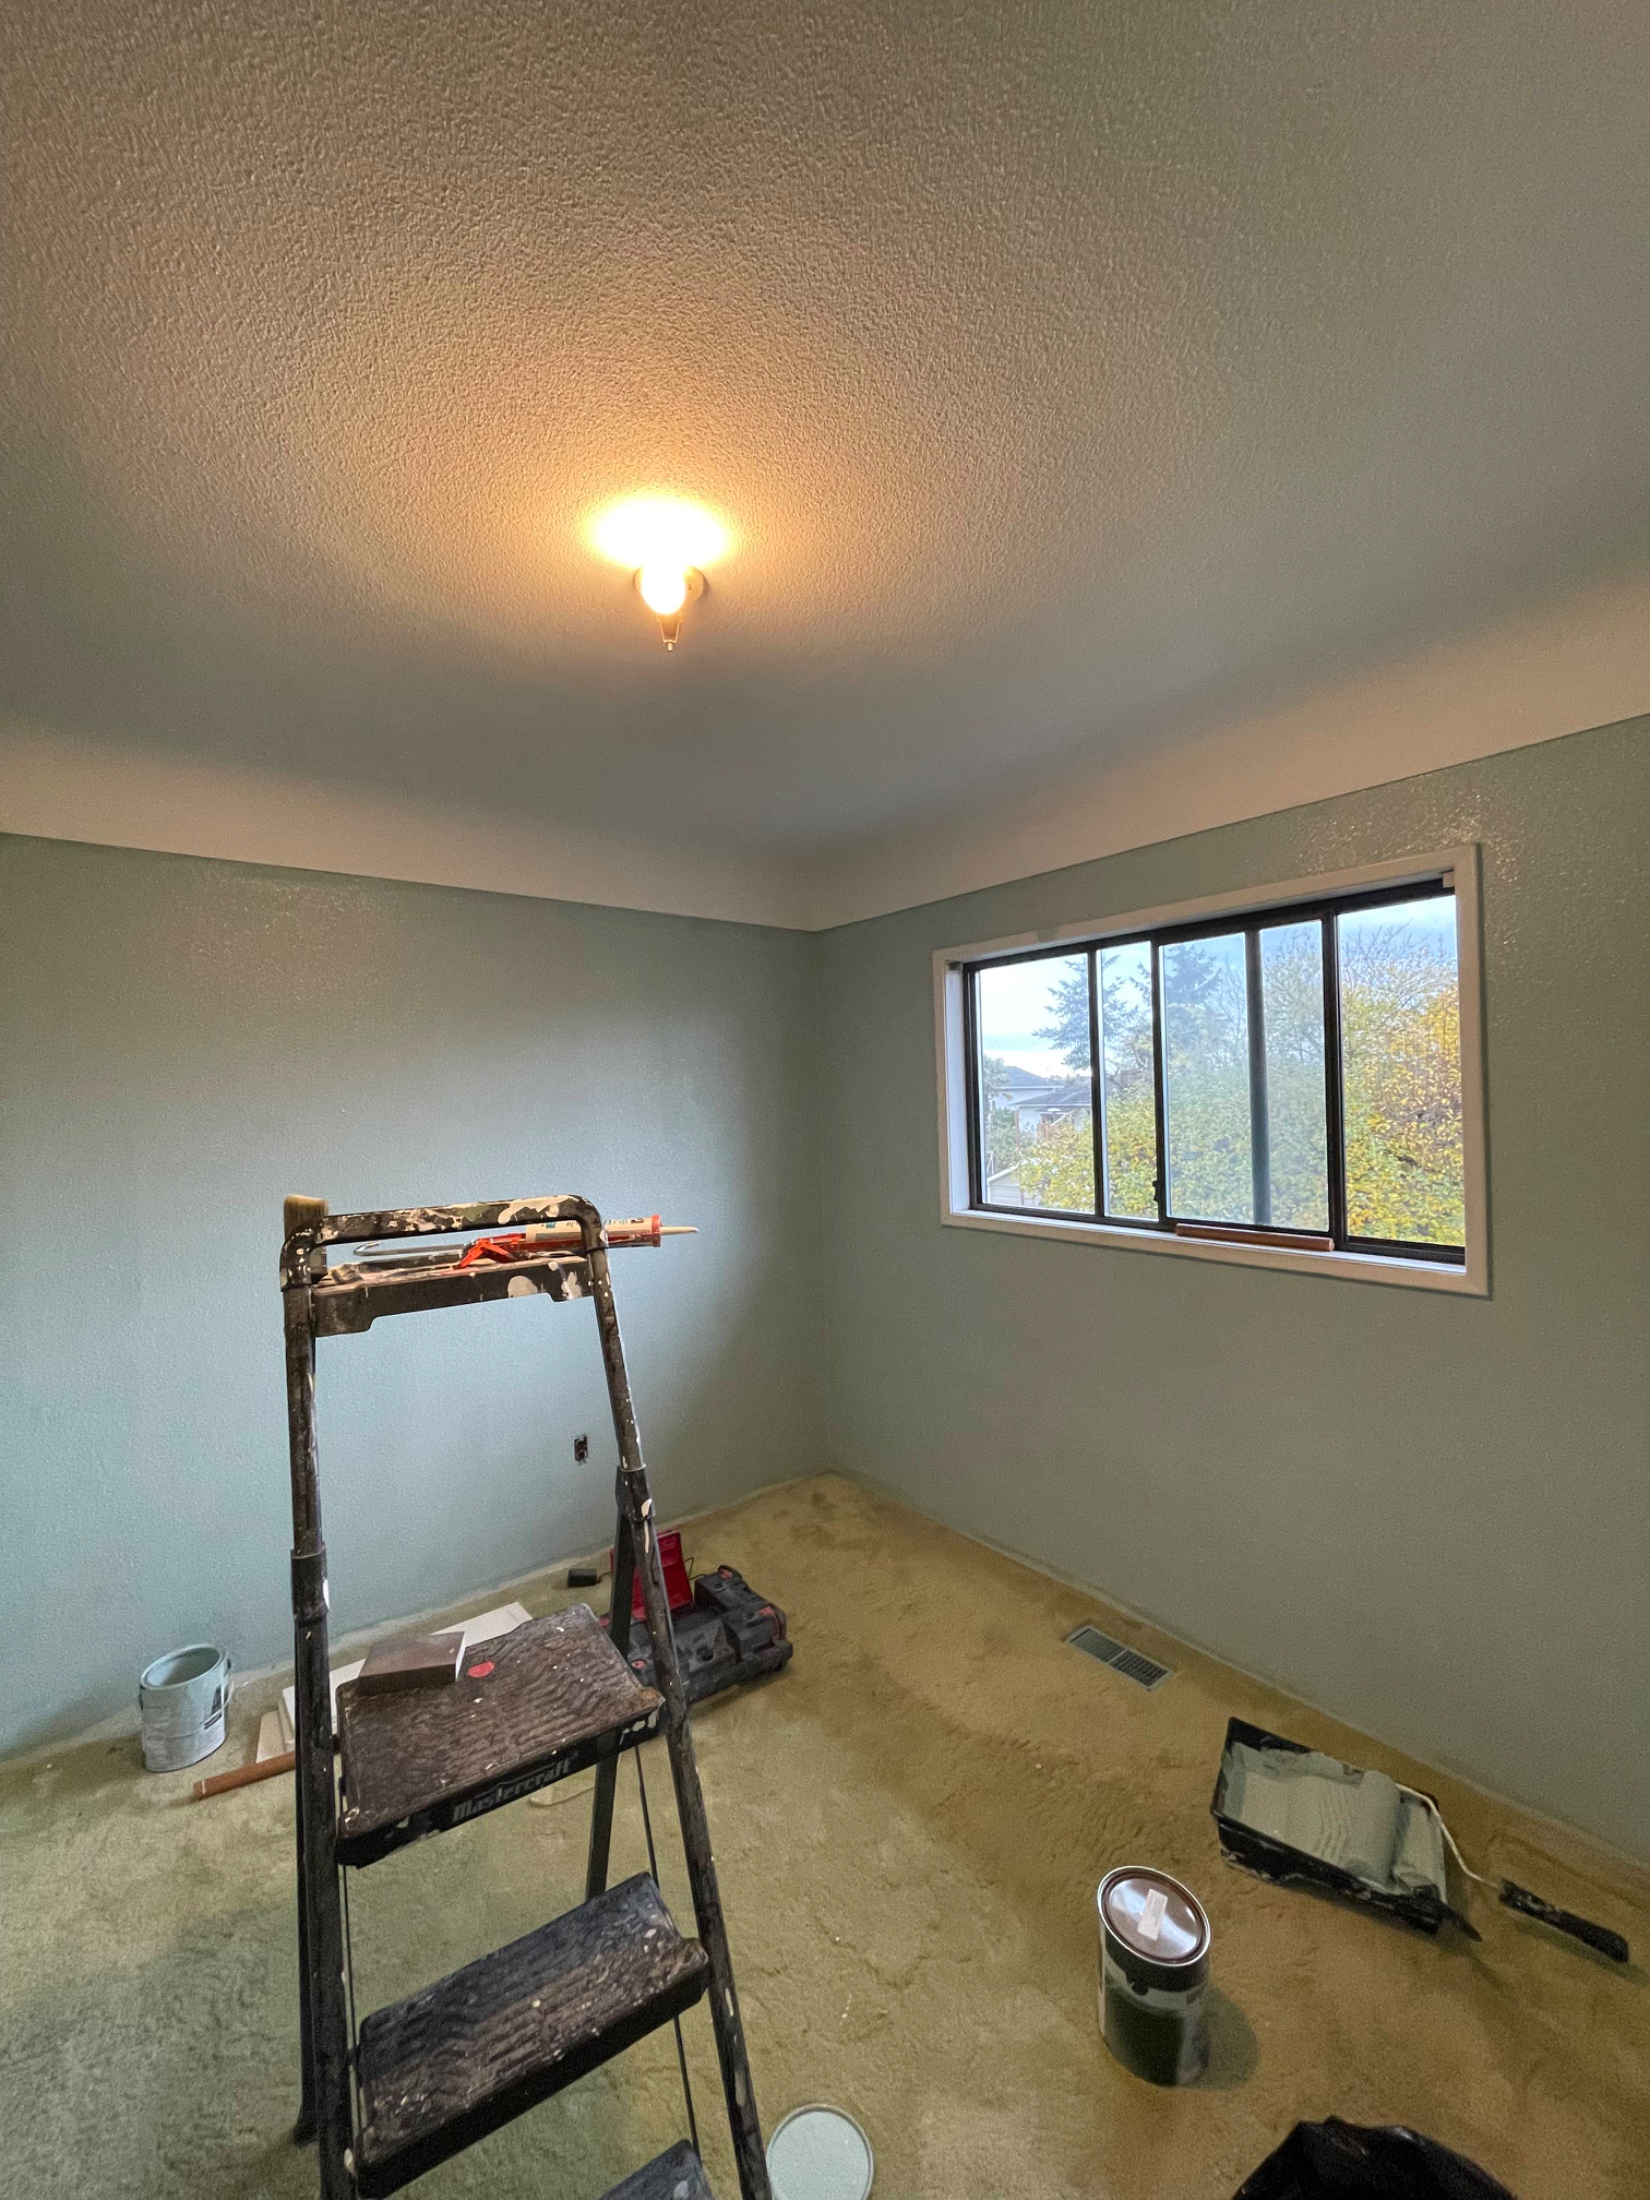
As a former NYC Building Superintendent Nicky has turned over plenty of co-ops and apartments (or condos as we say here:) We’ve implemented the NYC co-op paint scheme (UWS Manhattan, you’ll see the same colours used in many listings there). Ceiling white for the ceiling, two coats, walls got Linen White with built in primer, and trim and cabinets are painted in crisp white no tint semi gloss, doors as well. 

There’s a great Rustoleum product that gives countertops a fresh update - buy it on Amazon. We went with plain white but you could bring it to a paint store to tint it any colour you like. 

We donated the plants to friends and used Atlas Junk Removal for the bin rental, they were great with their timing and dispatch. They took the old fridge and stove and were extremely good with timing the removals (we filled 4).

The garbage removal took a week, including removing the upstairs carpets. The deep cleaning and paint prep another week. Each wall was scrubbed, literally, with a big scrubbing sponge and a TSP solution, then rinsed. Your reminder that when washing walls with TSP you want to be extremely careful to wear goggles and long rubber gloves, it’s nasty, but the best way to get a perfect paint finish. 

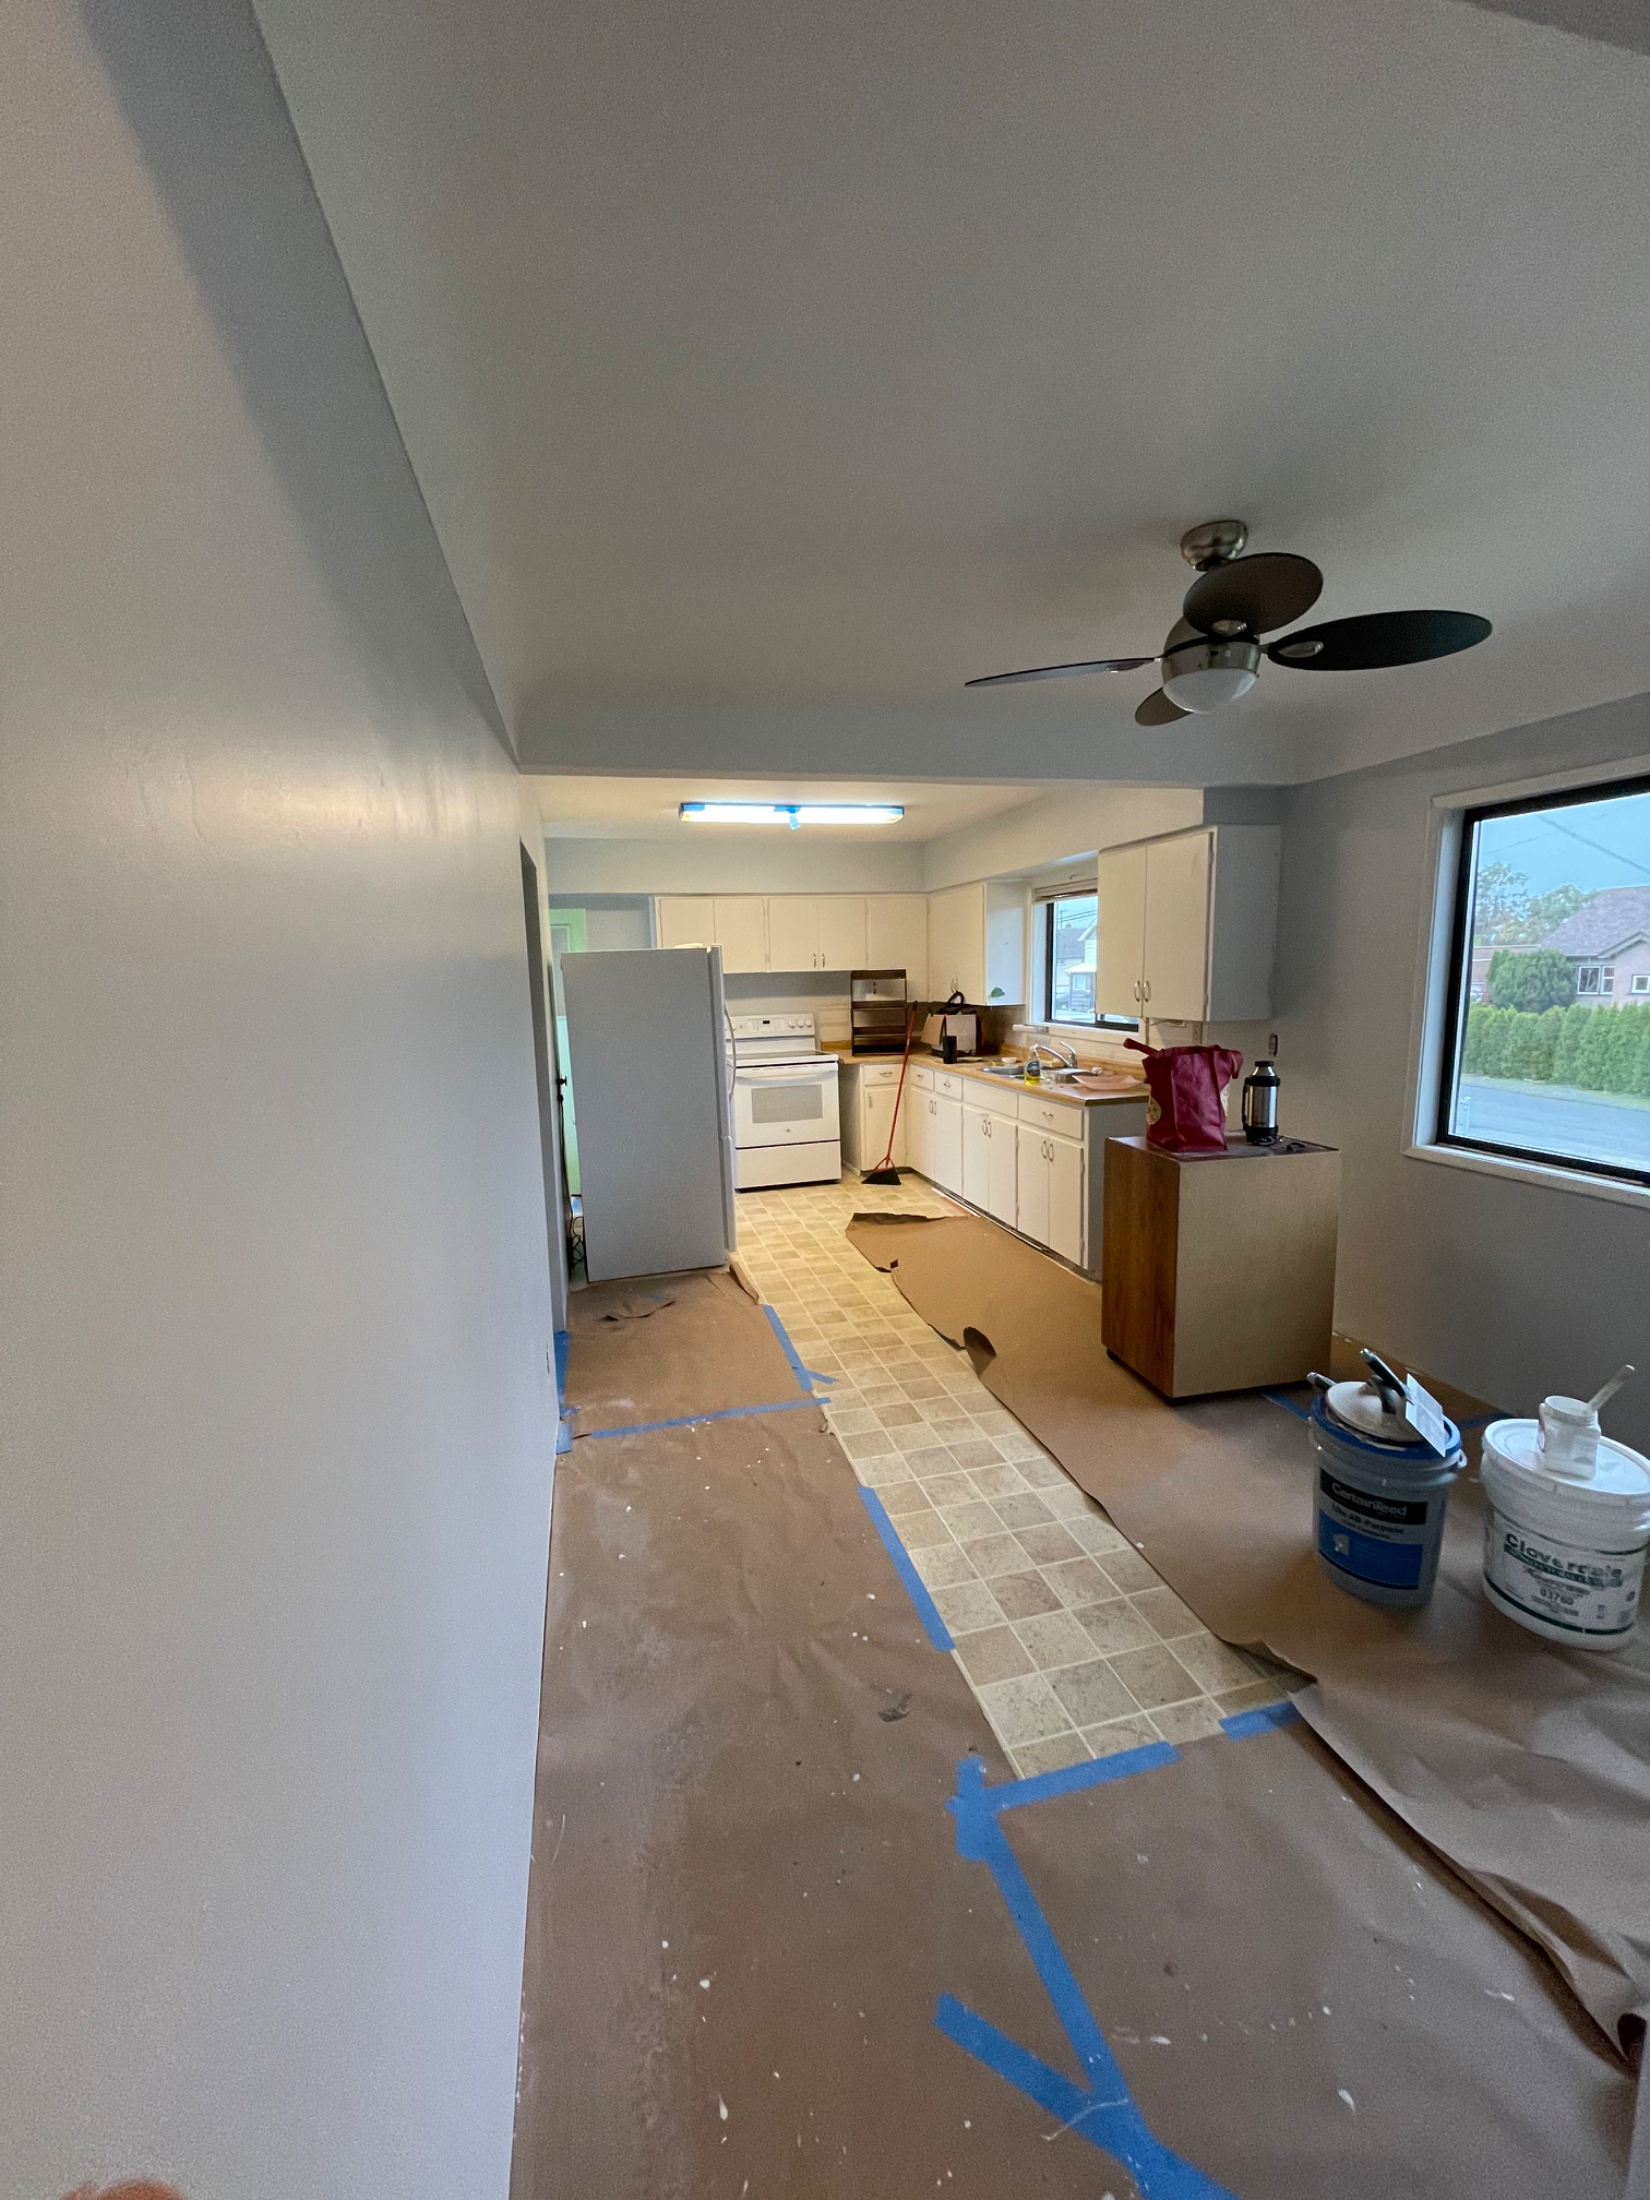
After the entire place is washed up we started on the other step to paint prep. Replacing some baseboards and damaged trim, caulking everything everywhere, filling ten million holes, waiting for them to dry, sanding and repeating :) It’s a lot of work and very time consuming but necessary. Taping the flooring downstairs, covering windows and baseboards, the prep is WERK. 

Painting the walls seems to take no time at all, but I would argue painting trim takes years off my life. Door frames, doors and doorknob removal, trim, window trim, trim on trim. The kitchen cabinets got a fresh coat of paint and so did the countertops.

Outside we pressure washed, gave the outside landscaping a hard pruning and clean up. Usually carpets take forever to coordinate installation in Victoria with a month lead time, but the folks at End of the Roll got us an awesome deal on high traffic berber and coordinated with us on a speedy installation. 

One of the toughest things about scheduling a cosmetic makeover like this is timing the flooring and appliances. Appliances (and furniture I would add) take forever to order when not in stock. We didn’t replace any cabinets so the oven and fridge were replaced where they were before, just now in shiny stainless steel. They came after the listing went live so we did some virtual staging to show potential buyers what the kitchen would look like with the fridge.

We’ve put the listing live on the market and have had a lot of interest! Leads have been coming in from Realtor.ca, buyer’s agents and open houses. Thanks to our Seller for the opportunity and very excited for the new owners to take over this space and call it their own. 

We had the nice folks at Real Foto do our photos and floor plans (including the virtual staging) and got to work marketing the property with online marketing and open houses. The open houses were super busy and we SOLD QUICKLY thanks to all the attractive fresh updates. 

Here’s our video again showcasing our before & after process. StackHaus Realty is YOUR Greater Victoria FULL SERVICE Real Estate Brokerage. 

Read

StackHaus Realty Property Management

StackHaus Realty Inc. is fully licensed in Property Management! Let our team of Property Managers and In-house Maintenance and Renovation experts help you manage and grow your Real Estate Portfolio! Serving all of Greater Victoria.

Read

1203 Lockley SOLD! Before & After

When my clients called me up and needed some help getting their house ready to list I could only think of one person for the job, Nicky who has turned over plenty of apartments and houses in New York. We worked with the client’s budget and spruced up the 1945 Character home in a matter of 3 weeks, and had an unconditional sale 2 weeks after that. Done and done! 

Here’s what we did: Christina got to work on leaf and weed removal, she loves to be in the garden and is a control freak, so tidying someone’s yard is a pleasure for her. We removed about 30 bags of leaves from the property and that included the large hedges that Nicky had pruned, providing privacy for this corner lot. Scroll down to see some before and afters…

And some “After” shots that we used for the listings pics - we also maintained the grounds during the sales process to make sure the yards looked sharp for potential buyers. This included watering the plants, mowing and trimming the grounds. 

After looks great! Tidy and ready for a buyer to see this house as their new home. After we’d tackled the yards and gardens we got to work on the pressure washing of the sunny patio. We brought in the big guns for this part, my German mother showed up with her German (of course) pressure washer and we cleaned it right up! 

This was my Mom’s face after she’d finished (haha put that Mom to work!) And my face covered in dirt after a fun day of pressure washing the new listing. Real Estate isn’t all glamorous! :) 

Check out the exteriors! Turned out so clean and tidy for the listing photos and showings with potential buyers. 

After we were done outside we got to work on the interior, Nicky removed some shelving and repaired all the walls in the entire house. This adorable house was just over 850 square feet but we still needed to give it a ‘New York turnover’ where all the walls are painted back to white or cream in every single room, ready for the new owners to move right on in. Nicky painted every room but the small hallway and the garage, so it was a fair job. He also caulked all of the baseboards and trim for a crisp and tidy paint job. After he was done Nicky went around to the doors and trim and painted them in a semi-gloss white. The results are awesome! 

Check out the after! We took these pastels and bright colours back to fresh white, a blank canvas where the next homeowner can envision their furniture in the space, and if they want to add a feature wall or another colour the walls have been freshly repaired and painted white, ready for their next life. 

The space felt larger, brighter, newer, fresher! We brought back Mom Stack to finish up the rooms with us, we cleaned the windows and blinds, made sure the kitchen was move in ready - Nicky rebalanced the stove, and my Mom finished up the floors with some industrial German floor wax (really) and those original Fir floors have never looked better! 

All this sprucing up getting 1203 Lockley Rd. for sale was all in vain if our marketing wasn’t on point! So we got our friends from Real Foto over to take photos, floor plans and video so we could showcase this awesome listing to potential buyers in it’s best light. Making my listings look good and showcasing their potential is my calling. 

I love to host open houses, it’s always so great to meet the neighbours and get their take on the listing and the market. Most homes (98%) in Greater Victoria are sold through a buyer’s agent, and that means gone are the days that someone walks off the street and into an open house and just buys one with no agent, but buyers do come through to check out the house and they do tell their friends and families, including the neighbours. It’s also a great time for the listing agent to get feedback from the buyers, a lot of agents don’t give feedback after a showing, but host a busy open house and ask people what they think and they’ll tell you! 

Being a homeowner in Esquimalt myself it was great to tell potential buyers not only about the features of the home but also the neighbourhood. When recording the video for the property I asked Real Foto to get some pictures of the iconic mid-century homes in the Rockheights area as well as the E&R Bike path and the many local amenities of Esquimalt. This listing backed onto a laneway with lots of garages and the potential to build a DADU (Detached Accessory Dwelling Unit). The bonus building was perfect for someone looking to have a home office or home based business. 

We found our buyer and are pending to close. We promoted this listing with targeted Social Media marketing including sharing a shortened version of this video on Instagram, Twitter, Facebook and LinkedIn. The open houses I hosted had a large portion of people coming from seeing the listing on MLS and through targeted ads. We really enjoyed this project and are happy for our sellers and the buyers of their new home! Welcome to Esquimalt! 

If you have a listing that you need someone to help spruce up, or you just need a fantastic Realtor to sell your home, drop me a line or call me anytime! As a licensed Property Manager I can also help get your rental turned over between tenants as well as find the best tenant and help manage your rental. 

Buy, Sell, Rent, Fix. We are your Victoria Real Estate experts.

Read

Fireplaces: Time to Upgrade!

Every time I tell someone I have an original wood burning fireplace in my upstairs they exclaim “Never change that!” but they don’t have to live with a wood burning fireplace. The soot, the smoke. It’s just so medieval to have an open fire in the home! Not to mention inefficient and impossible to ever build one of these again with today’s code.

I do love the retro lights on either side of the fireplace - those orange and yellow bulbs are original from the 1940s! They really don’t make them like they used to. The fireplace is located in the corner of the living room to make way for the big picture windows that sit on either side of the fireplace. I also love the original copper hood. 

In my downstairs area I had a non-functioning fireplace that I upgraded to gas. This fireplace can heat up to 600sf and is the main heat source for this downstairs guest/office area. I love having alternate sources of heat for emergencies. When I waited for a new boiler to come in I was very happy to have a gas fireplace to warm up to, and one day (ask me this winter) I’ll be happy to replace the one upstairs to gas as well. 

I chose a marble look ceramic tile for the fireplace surround, something to work with the tile in the open kitchenette area as well as bathroom located downstairs. All these rooms used a grey and white colour theme - very neutral - as you can see my art and furniture do not lack colour :) 

Read

Stack of All Trades

Growing up in Metchosin, my parents were Real Estate flippers and immigrants from Germany who were obsessed with fixing up and building houses. They would purchase small homes, renovate them and sell them for a profit. They’d even do this while they built a house at the same time. Sometimes they would hold them and rent them, and I learned a lot from them as builders and landlords.

I find such pleasure restoring an older house, breathing new life and energy into the walls of a home, making right the structure, systems and aesthetics. It’s these hands on experiences that make me an excellent Realtor, Associate Broker and Property Manager. 

Though I don’t have an official builder’s trade (My Realtor and Property Management licences are my ‘trade’) I love to paint and landscape. A fresh coat of paint is always necessary when buying or selling a new home, and I’m happy to help Nicky with his renovations when it comes to the last step because he is not a fan of watching paint dry :) 

Do I regularly go to the hardware store covered in paint? Yes. Do I show up to showings like this? No, unless it’s your 2nd or 3rd deal with me, ha! 

Below I’m sharing some of my favourite painting jobs starting with my guest bedroom which I painted a moody dark blue-green, saturating the baseboards with the same colour as well as matching the velvet curtains to give this room a super cozy feeling.

In the main living and dining area I painted the ceiling a soft flat light blue to open up the space even further, and highlighted the gorgeous original cove ceilings in a satin cream (most of the walls are the same colour - ‘Bavarian Cream’ but in eggshell. The main feature wall was painted ‘Jonestown Blue’.

Doesn’t the blue ceiling look great?! I love it! I also love how the light plays off the satin finish on the coved ceilings. They just don’t make them like they used to. This room was previously brown, it took a serious primer and 2-3 coats to finish. 

In the main bedroom (this was also painted a very dark yellow, almost brown) I painted the entire room in Bavarian Cream but applied a bottom level of ‘Aruba Blue’ by using a laser level to get a perfect line around the entire room. This is one of my favourite paint projects, the blue is so cheery (and echoed in the turquoise accent colour outside). 

The rest of the house is mostly painted in a neutral cream. Downstairs was painted in Oxford White because the Bavarian Cream colour from upstairs reads too yellow with less natural light. 

So now you know I love to paint! I believe most of the work is done in the prep - it takes precision to spackle and sand all the imperfections of a wall, caulk the baseboards, and TSP the walls. I really believe in washing the walls before a paint job, especially in a room like the kitchen or bathroom that can have handprints or grease that will show through the paint.

Aside from swearing by a TSP rinse to prep the walls, I also love using a 1.5 inch brush to cut in, and am very loyal to Cloverdale paint which I think is the best paint product in town! Show them a BCAA membership card for a great discount on paint! Painting this entire house took years in between my deals at work but I’m very happy with the results.

Read

Art Deco Esquimalt

Welcome to our restored 1940’s original Art Deco in Esquimalt! Built in 1943 for the Navy Lieutenant Geoff  Longstaff and his wife Lillian. What a house this must have been when it was first built! In what world does a family need over 3600sf of living space, but this Deco Diva is just that - and I’m proud to have owned this house as one woman on title for over 10 years. Before I met Nicky I was painting the days away in this house by myself, and I’m so happy to finally have someone to share this home with (including all the responsibilities :) 

This photo were taken just after the house was built, when I purchased the home it’s civic address was Esquimalt Rd. with the parking and main access on the street behind it (Wordsley St.)

The front yard that you can see in this picture has been completely enclosed by privacy hedges and now is my favourite place in the world - my front garden….

We are fortunate and grateful to have such a beautiful place to come home to, and I appreciate all the quirks and special things about this Art Deco. 

Restoring the Art Deco has been a real labour of love. The first place I started was the kitchen. There was no exhaust fan, just a sun bleached pink countertop, some old drawers that didn’t close properly, and peeling stick-on tile. It needed to go. I kept the original upper cabinets because they are actually built into the framework of the house and they curve with the curved wall of the front of the house, the very distinct Art Deco lines, or more specifically, the Art Moderne lines. 

We installed the most affordable glass tile that Home Depot had, an IKEA farmhouse sink and plain white cabinets. The gas cooktop was also from IKEA and I kinda wish I had put an induction in as I can’t stand cleaning the burner surrounds. The wall oven is a dream for tall people like me, and I love the light in this eat-in kitchen. 

Read

Bathroom Updates

Update your kitchen with glass and tile work! After installing two new bathrooms in my house I had to update my upstairs bathroom, and a simple glass door (Wayfair) with curved edge to match the bathroom mirror did just the trick. Now I can see my beautiful diamond shaped tiles and never have to deal with the shower curtain falling on my head again! See below for a better view of those tiles and (shudder) curtain rod…

In our downstairs bathroom we went crazy on tile work (a friend gave me some left over tile!) so this bathroom got a strip of marble accent tile and the other walls were covered in this beautiful cream beveled tile. 

This dual head shower is big enough for two and we put a built in bench for toiletries and leg shaving :) Classic chrome fixtures and hardware complete the look. 

Heated floors with a light grey shade and grout compliment the marble accent tiles. A simple grey Ikea floating vanity with a beveled mirror that highlights the bevelled subway tile detail. 

In the suite we also went big on the tilework with a larger tile on the walls and heated tile flooring. I think the suite could use a glass door upgrade in here too! 

You can tell we love the classic look of chrome fixtures. While black and brass bathroom fixtures are trendy and we love the edgy look, we felt the timeless appeal of Chrome looked best in this 1940’s Art Deco house. 

Read

Complete Suite Kitchen Renovation!

There are no ‘before’ pictures of this kitchen because it was that terrifying, the only thing we salvaged were the newish vinyl windows. Everything else had to be taken back to the studs and rebuilt! Because the ceilings are lower in this downstairs suite area we didn’t add any uppers or shelves, just beautiful counter to ceiling tile in a light green shade to help bring the garden views inside. 

There was no exhaust fan in this kitchen so we cut one in! For a more modern look we chose a slide-in range and a square edge laminate in faux-ash to give the room some warmth. Ikea basic white cabinets include hidden interior drawers for more storage. The entire suite was fitted with many pot lights to add light to this already bright and south facing eat-in kitchen. 

A simple farmhouse sink (IKEA) and boxed-in fridge completes the kitchen. New laminate flooring and baseboards give this kitchen a brand-new look and feel. 

Because the suite has no upper cabinets we decided to attach a freestanding open cupboard to use for glassware and dishes. I found this dining table on craigslist for $40 and it matches the countertop laminate! Love it :) 

Inspired by the garden views, Christina painted the art work that hangs in the kitchen. 

Read

Front Yard Makeover!

This original 1940’s Art Deco has a backyard for a front yard and was quite the eye sore before (see below) with it’s overgrown driveway and lack of patio for the suite area below. 

It all started when I rented a jackhammer….

The slanted, narrow 1940s driveway was already blocked off by the front yard’s fence, and getting down to the suite was a shuffle, dangerous and annoying. Goodbye driveway!

It was all fun and games removing the piles of rock, clay and soil until I hit Vancouver Island granite. Now I know why there was never a patio down there before! Behold the rock that I had broken up by an excavator…

We dug this front yard up and installed new perimeter drains, built a new split’nstack with poured concrete patio for the suite. It took forever and cost a small fortune. Here’s the jackhammer that started it all (shown here below removing the backyard patio, couldn’t help myself…) 

As a Realtor I sure don’t mess around with Perimeter drains - they are the most system of a home like this with a finished basement. 

Fast forward to today and I’ve never been happier with this front yard! A fresh coat of paint makes the back of this Art Deco look spectacular. I also updated the exterior accent colour from the classic Red to a bright Turquoise and I’m so happy with the results! Curb appeal is a real thing, and it doesn’t matter how renovated my interior was, coming home to the outdated exterior was a downer. 

Our new patio! I called in an arborist to cut the neighbour’s tree and they cut “fence to sky” allowing for even more light to come into the patio area. It may have taken me a decade to do it but I believe the Art Deco finally got the (front/back) yard it deserved :) 

Read

Before And After : Kitchenette for Office/Guest Area

We built out a kitchenette in our office/guest area downstairs and installed a washer/dryer combo with a multi-use large sink. This huge sink was needed as emergency drainage for this kind of combo washing machine but it also had a neat built-in dish rack and cutting board - perfect for a micro kitchenette! 

3 pot lights highlight the recessed kitchenette area painted Dove Grey to pick up the shades in the marble-look laminate countertop. We applied super easy and affordable stick-on tile for this low-traffic area and I love the arabesque lines of the backsplash tile! We then cut a board of inexpensive pine to custom fit the shelf space and finished it with a white stain.

To save on space we added extra long cabinet handles that double as dish towel racks and snuck some more drawers under the stairs. I love how the pot lights light up the glassware and highlight ceramics in this space :)

Read
MLS® property information is provided under copyright© by the Vancouver Island Real Estate Board and Victoria Real Estate Board. The information is from sources deemed reliable, but should not be relied upon without independent verification.